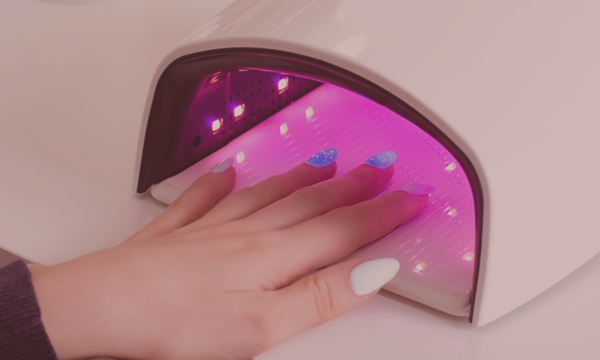
Find out how to carry out a gel nail refill: regrowth, removing lifted nails, creating a new tip, applying Builder Gel, filing and finishing with LuluNails Belgium.
Gel Nail Refills: When and How Should You Have a Gel Top-up? | LuluNails Belgium
Are your gel nails starting to grow out and is a gap appearing near the cuticles?
It isn’t always necessary to remove your entire set and start from scratch.
A gel nail refill, also known as gel touch-ups, allows you to address regrowth, rebalance the structure and restore a neat finish to the existing set.
This technique is one of the essential skills a nail technician needs to master.
But when should you carry out a refill? How much gel should you remove? Do you need to redo the tip? Can you change the colour? Which builder gel should you use?
In this comprehensive guide, LuluNails Belgium explains the main steps involved in a refill using builder gel.
Whatis a gel nail refill?
After a gel application, the natural nail continues to grow.
Gradually, a gap appears between the cuticles and the gel.
But regrowth isn’t the only factor to take into
As the nail grows, the structure created during the initial application also shifts forwards.
The apex is therefore no longer necessarily situated in the ideal area.
gel filling involves maintaining this existing structure.
The aim is, in particular, to:
- work on the regrowth area;
- remove any areas where the material has come away;
- trim the existing material if necessary;
- restore the structure’s balance;
- reposition the apex;
- correct the shape;
- apply new gel;
- change the colour if desired;
- apply a new finish.
A professional refill therefore does not simply involve applying gel to the empty space near the cuticles.
Top-up or new set: what’s the difference?
It is important to distinguish between these two services.
New gel application
A new application is mainly based on the prepared natural nail.
Depending on the technique, it may include:
- coating;
- capsules;
- tips;
- stencil;
- extensions;
- full nail construction.
Gel refill
A refill retains part of the existing build whilstit is still properly bonded and structured.
Part of the old product is removed or refined, then the new growth is prepared.
The gel is then reapplied to rebuild the structure.
This technique allows you to maintain a set regularly without systematically removing all the material.
When should you have a gel nail refill?
There is no single timeframe that applies to everyone.
Nail growth rates vary.
The length of time the gel has been on and daily habits also have an influence.
In practice, a top-up is usually recommended after several weeks of regrowth, before the structure becomes too unbalanced.
The right time can be identified by several signs.
7 signs that a gel refill is needed
1. Significant regrowth near the cuticles
This is the most visible sign.
A natural gap appears between the cuticles and the gel.
2. The nail tip has moved forwards
As the nail grows, the strengthening point also moves forwards.
The structure may become less balanced.
A top-up allows the material to be repositioned correctly.
3. The build appears heavier towards the free edge
A build that has become too far forward can give the impression that all the materialis situated at the front.
The structure must therefore be rebalanced.
4. Small areas of detachment are beginning to appear
A small area of detachment should not simply be covered with new gel.
The detached material must be properly removed before rebuilding the nail.
5. The shape has changed
After several weeks, the free edge may become longer and the original shape less defined.
A touch-up is also an opportunity to shorten and reshape the nails.
6. The client wishes to change the colour
It is possible to retain the properly bonded structure whilst removing the old colour.
You can then choose a new semi-permanent polish.
7. The length no longer suits her lifestyle
A top-up also allows you to shorten the nails withoutnecessarily having to remove the polish completely.
Can you have a top-up every 3 or 4 weeks?
This is a common frequency, but it should not be regardedregarded as an absolute rule.
Some people’s nails grow faster.
O&others’ nails grow more slowly.
It is therefore important to observe:
- regrowth;
- structure;
- any lifting;
- length;
- the overall condition of the extension.
The longer an extension is, the more important it is to check its balance regularly.
What equipment do you need to carry out a gel refill?
To carry out a touch-up correctly, prepare your workstation before you begin.
In particular, you may need:
- nail file; nails ;
- buffer ;
- professional nail file, depending on your technique ;
- suitable attachments ;
- dust brush ;
- cuticle pusher ;
- Cleaner ;
- Nail Prep;
- Primer as per the protocol;
- Base Coat if required by the system;
- Builder Gel;
- gel brush;
- compatible UV/LED lamp;
- semi-permanent polish;
- Top Coat;
- cuticle oil to finish the treatment.
The equipment used naturally depends on your technique and the system you choose.
How to do a gel nail refill step by step?
Here are the main steps for a touch-up.
Step 1: examine the existing set
Beforeuse a file or sander, examine each nail.
Look for:
- lifting;
- cracks;
- breaks;
- weakened areas;
- excessive length;
- uneven structure;
- any abnormalities in the natural nail.
This assessment helps to determine whether a fill is appropriate or whether another procedure is preferable.
Step 2: trim the nails if necessary
The client may wish to keep her nails at their current length.
However, you can also take advantage of the refill to trim them down.
Trim gradually:
- the free edge;
- the shape;
- the sides.
Avoid cutting an extension too drastically without checking its structure.
Step 3: remove the old colour
If a semi-permanent polish has been applied to the nail build-up, remove it so that you can properly see the gel underneath.
This will make it easier to detect:
- deadhesion issues;
- cracks;
- air bubbles;
- irregularities.
Depending on your technique, this step can be carried out using a file or a sander with a suitable attachment.
Step 4: remove all areas where the gel has come away
This is an essential step.
Never simply apply new gel over a lifted area.
The lifted area must be removed until the material adheres properly again.
Otherwise, you risk leaving a pocket between the old gel and the nail.
Work gradually without unnecessarily damaging the natural nail plate.
Step 5: reduce the old build-up
It is not usually necessary to remove all the gel that is properly adhered.
The aim is ratherto reduce the old restoration sufficiently so that it can be rebalanced.
In particular, work on:
- the old apex;
- the thickness;
- the free edge;
- the parallel lines;
- the transition between the old material and the regrowth.
The surface should gradually become even.
Step 6: prepare the regrowth area
The new section of natural nail must be prepared as duringapplying nails.
Gently push back the cuticles.
Remove any small flaps of skinto the nail plate.
Matte the natural area according to your protocol.
Take care not to file the nail excessively.
Step 7: remove all dust thoroughly
After filing, remove all dust.
Clean:
- the surface;
- the sides;
- the area near the cuticles;
- the free edge.
Dust trapped within the new nail extension can compromise the quality of the result.
Step 8: apply Nail Prep and Primer if necessary
On the newly exposed natural nail, apply your preparation products in accordance with the protocol for the system being used.
These may include:
Nail Prep
and, if necessary:
Primer
Avoid automatically applying large quantities of Primer to the entire old nail extension.
Follow the instructions for the product you are using.
Step 9: Apply the base coat if the Builder Gel requires it
Some builder gels require a Base Coat or a specific bonding layer.
Other systems follow a different protocol.
Therefore, only apply the base coat recommended for your Builder Gel.
Avoid any contact with the skin.
Step 10: Apply the new Builder Gel
You can now rebuild the nails.
Apply your Builder Gel so as to create a smooth transition between:
- the natural regrowth;
- the old material;
- the new gel.
The cuticle area must remain thin.
The amount of material increases gradually towards the area requiring more reinforcement.
Step 11: reposition the apex
This is one of the key differences between a proper refill and simply filling in the regrowth.
The old apex has moved forward as the tooth has grown.
It is therefore necessary to create a new apex adapted to the current length.
Observe the profile placement.
The structure must be balanced.
Avoid:
- theapex being too far forward;
- the apex being too close to the cuticles;
- a completely flat build;
- an excessive amount of product.
Step 12: allow the gel to self-level
If you are using a LuluNails Self-Levelling Builder Gel, allow the gel to spread out gradually.
Guide it with your brush rather than working it excessively.
Depending on the texture and your technique, briefly turning your finger over may help to re-centre the gel.
Always check the sides and cuticles before curing.
Step 13: Cure under a UV/LED lamp
Position your hand correctly under a compatible lamp.
Follow the product’s instructions.
For certain LuluNails gels, the instructions may be as follows:
LED: approximately 60 seconds
UV: approximately 120 seconds
Always check the product information sheet for the specific product used.
An extremely thick layer should not be regarded as a way of working more quickly.
Step 14: check the build
After curing, examine the nail:
in profile
to check the apex;
from the front
to check the thickness of the free edge;
from above
to check parallelism and symmetry.
A successful construction must be balanced in all three directions.
Step 15: carry out the finishing filing
If necessary, correct:
- surface;
- parallel lines;
- free edge;
- cuticle line;
- shape.
With a self-levelling gel applied correctly, the amount of correction required can be reduced.
However, the aim is not strictly to avoid filing altogether.
The aim is to achieve the correct shape.
Step 16: choose the new colour
One of the advantages of colouring is that the client can completely change her style without having to redo the whole extension.
You can apply:
- nude;
- Milky;
- pink;
- red;
- burgundy;
- chocolate;
- blue;
- green;
- plum;
- French;
- Baby Boomer;
- Nail Art.
The base can therefore remain in place whilst the look changes completely.
Step 17: apply the Top Coat
Finish with a compatible top coat.
You can choose according to the desired result:
- glossy;
- matt;
- natural finish.
Cure according to the instructions.
Once the application is, you can apply cuticle oil.
Which builder gel should you choose for a refill?
The ideal gel depends mainly on your technique and the previous build.
At LuluNails, various colours are available.
Clear Builder Gel
The Clear is particularly versatile.
It is suitable when you wish to:
- maintain a clear build;
- apply any colour afterwards;
- create certain designs;
- avoid altering the colour of the existing base.
It is a practical option for professionals who wish to use the same Builder Gel in different colours.
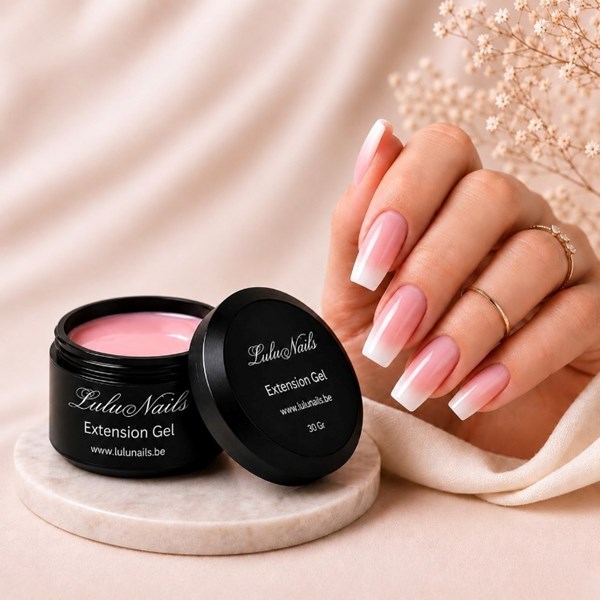
Nude Pink Builder Gel
A Nude Pink Builder Gel allows you to create a natural base instantly.
It is particularly suitable for:
- coating;
- natural filling;
- French manicure;
- Baby Boomer;
- nude designs.
If the client prefers natural manicures, it can sometimes simply be covered with a top coat.
Pink Cover Gel
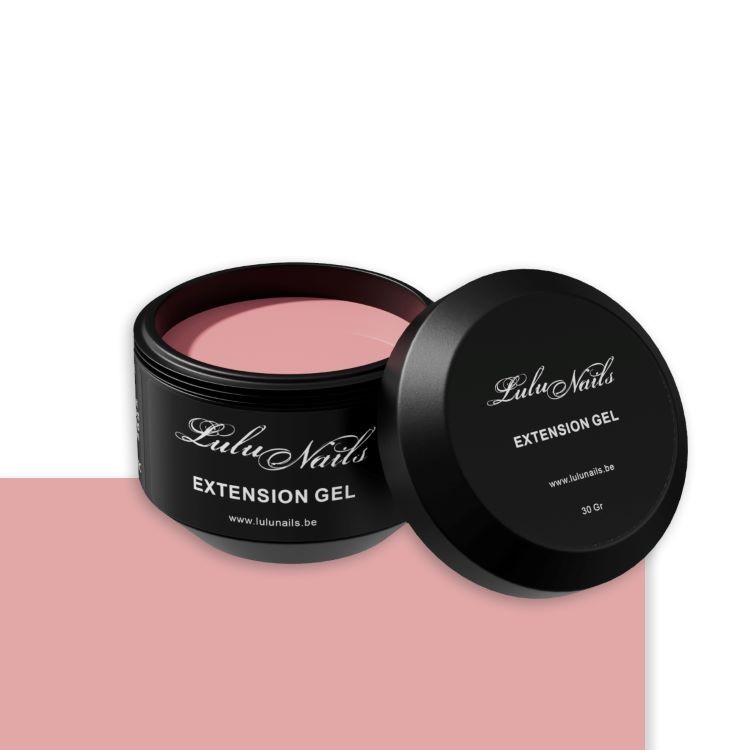
The Rose Cover offers greater coverage.
In particular, it helps tovisually even out the nail plate and more easily conceal the transition between certain areas.
It is particularly useful for:
- French manicure;
- Baby Boomer;
- natural, full-coverage designs;
- visual corrections to the nail plate.
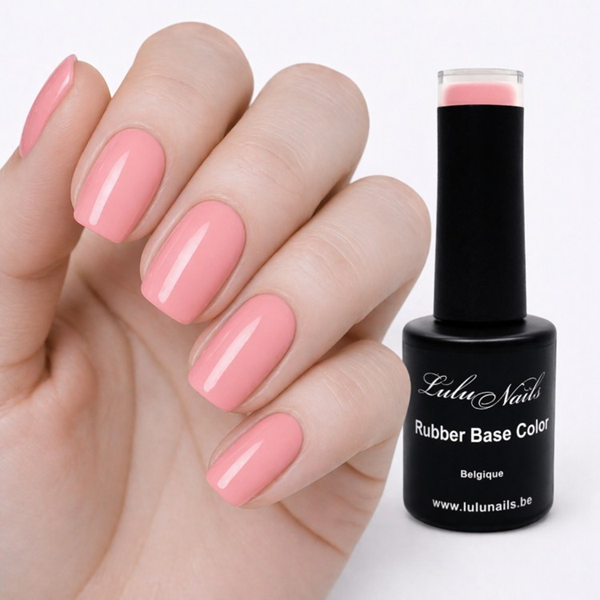
Nude Caramel Gel Build-up
Nude Caramel creates a warmer base.
It is ideal for clients looking for a nude shade that is different from the traditional pink.
It can be used for a natural refill or as a base before applying nail art.
Natural Milky Builder Gel
Milky provides a slightly milky white finishmilky finish.
It is particularly suitable for:
- Milky Nails;
- Baby Boomer;
- French;
- natural manicures;
- wedding manicures.
A fill using Milky gel can already produce a very elegant result evenapplying colour.
Builder Gel in a pot or Flexible Builder Gel for a fill?
Both can be used depending on the application technique and the product’s characteristics.
Bottled Builder Gel
It is particularly suitable when you need to work on:
- complex designs;
- extensions;
- greater length;
- structural corrections;
- a build requiring greater control.
Flexible Builder Gel in a bottle
It can be very useful for:
- coating;
- natural nails;
- short builds;
- light fills;
- strengthening.
Its built-in brush allows for quick application.
For long extensions or complex designs, a suitable jarred builder gel is generally more appropriate.
Gel refills without filing: is it possible?
Self-levelling gels can sometimessignificantly reduce the amount of filing required.
If theprevious application is very clean and the new build is perfectly executed, any corrections may be minimal.
However, a truly professional refill always begins with inspecting and preparing the old build.
In particular, the following must be removed:
- old paint;
- flaking paint;
- excess thickness;
- structural defects.
The term ‘no sanding’ therefore mainly refers to the final finish when applied with precision.
Can you fill a gap using a sander?
Yes, provided you know how to use the sander properly.
It can help with:
- removing colour;
- trimming down the old material;
- removing certain areas of lifting;
- correcting the structure.
However, a nail file can also quickly damage the natural nail if the technique is not mastered.
The pressure applied, the speed and the choice of bit are essential.
Which tip should you choose to remove the gel?
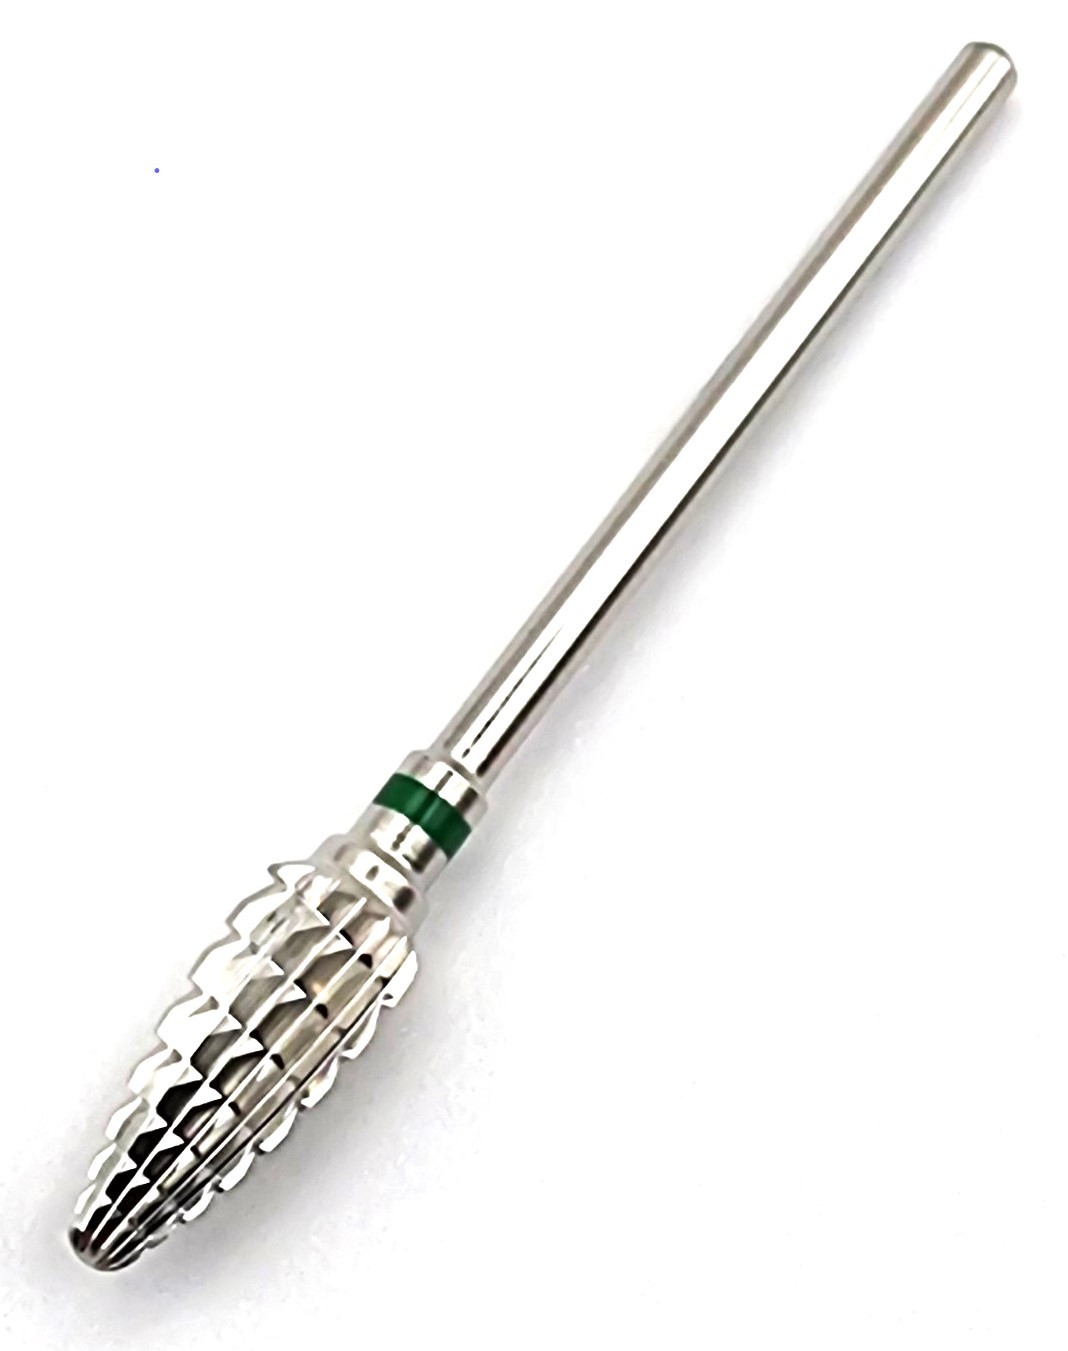
To remove or trim a gel manicure, professionals typically use specific carbide or ceramic bits designed for working with theartificial nail.
LuluNails offers a range of shapes and grit sizes for professional bits.
The colour of the band helps to identify the level of abrasiveness of many models.
A bit designed for quickly removing gel is not necessarily suitable for working on natural nails.
It is important to know the exact function of each bit before using it.
Can you carry out a refill without a nail file?
Yes.
A manual nail file can also be used to carry out a refill.
This method generally takes longer but is entirely feasible.
In particular, you will need to:
- remove the finish;
- remove the paint;
- reduce the old build-up;
- remove any flaking;
- refine the surface.
For a beginner who has not yet mastered the sander, a file may be a safer option.
Can you completely change the shape whilst filling?
Within certain limits, yes.
For example, it is possible to shorten and slightly alter the shape:
- square;
- soft square;
- oval;
- almond-shaped.
However, completely transforming a very different shape may require more material to be removed.
In some cases, a new construction may be more appropriate.
Can we switch from a dark colour to ‘Milky’ whilst filling?
Yes, provided the old visible colour is completely removed.
This is precisely one of the advantages of building with a Builder Gel that is a different colour from the top coat.
For example:
Nude Pink Gel Bordeaux
can become, when refilling:
Nude Pink Gel Milky
without necessarily having to remove the entire structure that is properly bonded.
What should you do if there are several areas where the gel has come away?
If the previous applicationhas a lot of areas where the nails have come loose, do not try to keep the entire set at all costs.
Remove each area that is not adhering properly.
If a large part of the installation is compromised, a more extensive removal and reconstruction may bebe more appropriate.
Never fill over an air pocket.
Top-up or complete removal: how to choose?
A top-up is a good option when:
- the majority of the build adheres correctly;
- the nail does not present any particular problems;
- the shape can be corrected;
- the length remains suitable.
Removal or a more extensive reconstruction may bewhen the following are present:
- significant lifting;
- extensive breakage;
- a severely;
- a major change in technique;
- doubts regarding the condition of the natural nail.
Each application must be assessed on a case-by-case basis.
Why does the apex need to be redone with every refill?
Because the natural nail grows.
The apex built three weeks previously has therefore also moved forward.
If you simply add product near the cuticles without altering the structure, the thickest part will remain too far forward.
As you carry out further fills, the result could become:
- heavy;
- unbalanced;
- too thick at the free edge;
- insufficiently reinforced in the new stress zone.
Repositioning the apex is therefore an essential step in the filling process.
Why should a lift not be left in place?
When part of the gel no longer adheres to the nail, it must be removed.
Applying a new layer on top does not properly restore adhesion beneath the old material
The problem simply remains trapped beneath the new gel.
Before applying a new product, you must return to an area with proper adhesion.
The most common mistakes made during a refill
Applying new gel directly onto regrowth
Without rebalancing the old build, the apex continues to advance.
Leaving small pockets of detachment
Any material thathas come away must be removed.
Filing the natural nail too aggressively
New growth does not require aggressive filing.
Using too much gel
The refill should not make the nail progressively thicker with each appointment.
Do not trim down nails that have become excessively long
Length directly affects the nail’s shape.
Insufficient curing
Always follow the instructions for the gel and lamp being used.
Touching the cuticles with the Builder Gel
Any uncured gel that has come into contact with the skin must be removed before curing.
How can you prevent nails from becoming too thick after several refills?
This is one of the classic mistakes.
At each maintenance session, you must remove enough of theold material before adding new.
Otherwise, the thickness will gradually increase.
Think of the filling as a partial reconstruction rather than the continuous addition of new layers.
Before applying the new Builder Gel:
- trim the old apex;
- refine the structure;
- correct the free edge;
- check the sides.
Then rebuild neatly.
Gel Fill for French Manicure
The French manicure can be refreshed during the refill.
Start by rebuilding the base with a Builder Gel:
- Nude Pink;
- Nude;
- Cover;
- Milky.
Once the structure is complete, create your French manicure.
You can choose:
- classic white;
- micro-French;
- chocolate French;
- burgundy French;
- coloured French.
Finish with the Top Coat.
Gel Fill for Baby Boomer
For a Baby Boomer, a Rose Nude or Cover gel can provide a natural base.
The white gradient is then built up using your chosen technique.
The result can be finished with a glossy top coat to createa natural, luminous manicure.
Gel Refill with a new Semi-Permanent Polish colour
Once your build is complete, you can choose from the LuluNails Semi-Permanent Polishes.
For example:
Spring: nude, pink, pastel.
Summer: bright colours and reds.
Autumn: dark burgundy, chocolate, mocha, plum, olive green.
Winter: deep red, burgundy, midnight blue, glossy colours.
Topping up therefore &you to refresh your manicure regularly without necessarily changing the nail build.
LuluNails products fora gel top-up
LuluNails offers various useful categories for maintaining gel manicures:
Builder Gel
To rebuild the nail structure.
Flexible Builder Gel
For certain types of coating and strengthening on natural nails.
Nail Prep and Primer
To prepare the new growth in accordance with the protocol.
Base Coat
When the gel used requires a bonding.
Semi-Permanent Polish
To change the colour after the build.
Top Coat
To protect and finish the application.
Buffers and Bits
For professionals who use electric manicure tools.
Files and accessories
For preparation, correction and finishing.
UV/LED lamp
For curing compatible products.
LuluNails HEMA- and TPO-free builder gels
The LuluNails Builder Gels are formulated without HEMA or TPO.
The range includes a variety of finishes:
- Natural Milky;
- Clear;
- Nude Pink;
- Caramel Nude;
- Pink Cover.
Several sizes are available to suit both occasional use and more regular salon work.
As with all UV/LED products, avoid contact between the uncured product and the skin, and follow the curing instructions.
Where can you buy nail-filling gel in Belgium?
LuluNails is a Belgian brand specialising in professional nail products, with a presence in Liège and an online shop.
Here you can find the products you need to apply a full set or a top-up:
- Builder Gel;
- construction gel;
- Flexible Builder Gel;
- Base Coat;
- Top Coat;
- Nail Prep;
- Primer;
- semi-permanent polish ;
- UV/LED lamps;
- nail files;
- bits;
- files ;
- brushes.
This allows you to group the different stages of your procedure within the same product range.
Gel Nail Refill Training in Liège
Are you struggling to properly remove lift, reposition the apex or balance your build?
Refills are one of the key techniques to master duringa comprehensive gel course.
At LuluNails in Liège, the gel course includes, amongst other things, full applications and touch-ups, enabling you to gain practical experienceon maintaining an existing set.
You will therefore learn:
- preparing the regrowth;
- removal of the old material;
- correct application of gel;
- reconstruction;
- apex;
- shape;
- shape correction;
- French manicure;
- Baby Boomer;
- finishing.
FAQ – Gel Nail Refills
What is a gel refill?
A gel refill involves maintaining a gel manicure after thenatural nail has grown out, by removing the necessary areas and then correctly rebuilding the structure.
When should you have a gel nail refill?
A refill is usually carried out after several weeks, depending on the rate of growth, the length and thecondition of the nails.
Do you need to remove all the gel to carry out a top-up?
No. Gel that is properly bonded can usually be left in place. However, any lifting, discolouration and excess material mustremoved.
Do you need to reshape the apex during a top-up?
Yes. As the nail grows, the old apex moves forward. Thestructure must therefore be rebalanced and the apex repositioned.
Can you change the colour during a top-up?
Yes. Once you have rebuilt the structure, you can apply a new colour of semi-permanent nail varnish.
Which gel should be used for a top-up?
A builder gel compatible with the technique can be used. The choice of viscosity and rigiditydepends on the nail and the build.
Can you carry out a refill using Builder Gel from a bottle?
Yes, for certain short applications or certain nail wraps where Flexible Builder Gel is suitable for this use.
Can a refill be done without a nail drill?
Yes. It is possible to work entirely with a manual file.
Which tip should be used for gel refills?
The choice depends on the stage of the procedure and your level of skill. Carbide or ceramic bits are used in particular to reduce certainartificial nails. Always use a grit size and shape suitable for the task at hand.
Why do you need to remove any lifting?
A lifted area no longer adheres properly to the nail. It must be removed before adding any new material.
Why do my nails become very thick after several refills?
This often happens when too little of the old material is removed before applying the new gel.
Can a long set be converted to a short set during a refill?
Yes. The length can be shortened, but the structure must then be completely rebalanced.
Can a French manicure be done after a top-up?
Yes. A new French manicure can be applied once the reconstruction is complete.
Which LuluNails Builder Gel should I choose for a natural-looking application?
Rose Nude, Nude Caramel, Rose Cover or Milky Naturel allow you to achieve different natural-looking results depending on the desired coverage.
Are LuluNails gels HEMA- and TPO-free?
The relevant LuluNails Builder Gels and Flexible Builder Gels are formulated without HEMA or TPO. Thestandard precautions for UV/LED products remain essential.
How to achieve a successful gel refill with LuluNails Belgium
A professional gel refill is not simply a matter of filling the gap created by nail regrowth.
To achieve a neat and balanced application:
remove any lifting;
trim back the old build;
prepare the new growth;
reposition the apex;
check the structure;
cure properly;
finish with colour and a top coat.
Findat LuluNails Belgium: builder gels, flexible builder gels, semi-permanent polishes, nail files, tips and all the accessories you need for your nail applications and refills.
LuluNails – Professional nail products, a Belgian brand based in Liège.