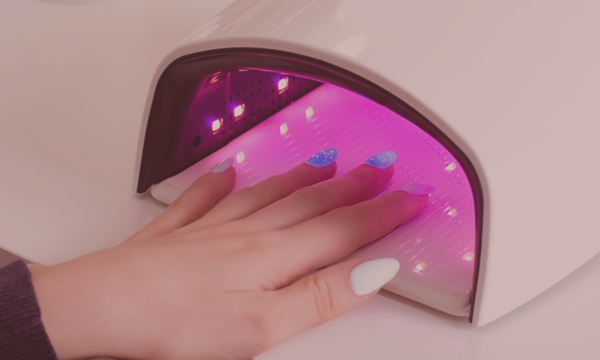
Which builder gel should you choose when you’re just starting out? Find out which viscosity, colour and texture are easiest to work with. LuluNails Belgium can advise you on choosing a professional-grade gel suitable for base coats, tips and extensions.
Which Building Gel Should You Choose When You’re Just Starting Out?
Getting started with gel nails can seem complicated. There are many different textures, viscosities and colours: liquid gel, thick gel, self-levelling gel, Builder Gel, Flexible Builder Gel, Clear gel, Milky gel, Nude gel and Cover gel.
For a beginner, the best choice isn’t necessarily the hardest, most expensive or thickest gel. Above all, you need tochoose a product that is easy to control, suited to the technique you’re using, and stable enough to build the nail without running into the cuticles.
At LuluNails Belgium, a Belgian brand and supplier specialising in professional nail care products based in Liège, we help beginners and nail technicians to choose the right gel for their skill level, their clients and their budget.
What is a builder gel?
A builder gel is a light-curing product used to strengthen, shape or extend nails. It cures under a compatible UV or LED lamp.
Depending on its formulation, it can be used to create:
- a coating on natural nails;
- a nail extension with an apex;
- an extension using tips;
- an application using capsules;
- an extension using a template;
- a repair;
- a filling;
- a French Manicure;
- a Baby Boomer;
- encapsulated nail art.
Unlike semi-permanent polish, builder gel is designed to create structure and strengthen the stress zone of the nail.
What is the Best Builder Gel for a Beginner?
To start with, you should generally choose a medium-viscosity self-levelling gel.
This texture offers a good balance: it spreads gradually over thenail, whilst allowing enough time to build the design before it runs onto the skin.
A good gel for beginners should be:
Easy to pick up with the brush
Stable during application
Self-levelling without being too runny
Easy to control near the cuticles
Suitable for tip-building and short extensions
Compatible with a suitable UV/LED lamp
Available in an easily visible colour
However, the choice depends on the type of nail, its length and the product’s application protocol.
Understanding the Viscosity of Builder Gel
Viscosity refers to the fluidity or thickness of the gel.
Low-viscosity gel
A low-viscosity gel is very fluid. It spreads quickly and can create a smooth surface.
However, for a beginner, it presents several difficulties:
- it runs quickly towards the cuticles;
- you have to work quickly;
- it is more difficult to build several nails before curing;
- it may come into contact with the lateral folds;
- it requires greater control.
This texture is often easier for an experienced professional to use.
Medium-viscosity gel
Medium-viscosity gel is generally the easiest option for beginners.
It allows you to:
- the material to be moved without precipitation;
- to build the apex;
- to correct the surface;
- to carry out a lining;
- to create short or medium-length extensions;
- to minimise drips.
For beginners, it often offers the best balance between stability and self-levelling.
High-viscosity gel&
The thick gel stays in place better and may be useful for extensions or in high temperatures.
However, it can be more difficult to apply evenly. A beginner may end up with:
- a layer that is too thick;
- an uneven surface;
- bumps;
- incorrectly positioned apex;
- a longer filing process.
A very thick gel is therefore not automatically easier.
Self-levelling gel or no-file gel?
Self-levelling gel
A self-levelling gel spreads gradually across the surface of the nail. It helps to reduce brush marks and create a more even;uniform shine.
For a beginner, its main advantages are:
Smoother application
A more even finish
Fewer brush strokes
Reduced filing time
Cleaner application with practice
However, you must take care to ensure the product does not come into contact with the skin.
No-file gel
The term ‘no-file gel’ generally refers toa product that can provide a finish smooth enough to significantly reduce the need for filing when the technique is properly mastered.
This does not mean that no adjustments will ever be necessary. A beginner may still need to make adjustments:
- the shape;
- the parallels;
- the thickness;
- the free edge;
- the cuticle area.
The priority remains a balanced build, not the complete absence of filing.
Which Gel Colour Should You Choose to Start With?
Clear Gel
Clear Gel is versatile and allows the natural nail, the nail form and the structure to be seen.
It is ideal for:
- encapsulation;
- Nail art;
- transparent extensions;
- building under a semi-permanent polish;
- repairs.
However, the transparency can make the apex and any irregularities less easy for a beginner to spot.
Nude Pink Gel
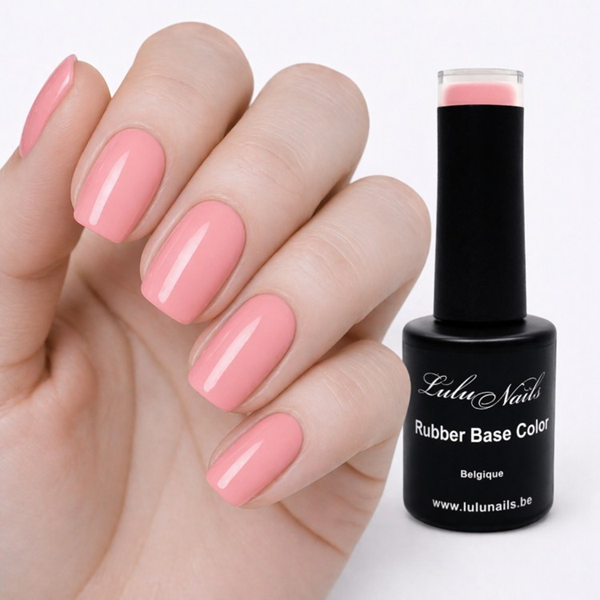
Nude pink is one of the best choices for beginners. Its colour makes it easier to visualise the amount of material and the structure.
It’s ideal for:
- body sculpting;
- for natural manicures;
- for the French manicure;
- the Baby Boomer;
- short extensions;
- wedding manicures.
Gel Cover
Gel Cover generally provides greater coverage. It helps to visually even out the nail plate and conceal certain imperfections.
It is recommended for:
- French manicures;
- visually lengthening the nail plate;
- aesthetic corrections;
- nude manicures;
- the Baby Boomer.
A highly pigmented Cover must beapplied in accordance with the specified thickness and curing time.
Milky Gel
Milky gel creates a milky white effect, which is soft and elegant.
It can be used for:
- Milky Nails;
- the Baby Boomer;
- minimalist designs;
- natural bases;
- delicate nail art.
For a first purchase, a nude pink or a natural-coloured polish is often more versatile.
Builder Gel or Construction Gel: What’s the Difference?
The term Builder Gel simply means ‘construction gel’. Depending on the brand, it may refer to a gel in a pot or bottle designed for shaping and building.
A Builder Gel can be:
- flexible;
- rigid;
- self-levelling;
- medium viscosity;
- transparent;
- nude;
- Milky;
- Cover.
It is therefore important to read the product description rather than relying solely on its name.
For a beginner, a medium-viscosity, self-levelling Builder Gel can be a very good choice.
Flexible Builder Gel or Rigid Gel?
Flexible Builder Gel
Flexible Builder Gel offers greater flexibility. It is often used to strengthen short or medium-length natural nails.
It may be suitable for:
- nail wraps;
- for flexible natural nails;
- short manicures;
- for natural-looking applications;
- for beginners wishing to work with bottles.
It is not necessarily suitable for all long extensions.
Stiffer builder’s gel
A rigid gel is generally better suited to builds and extensions requiring greater stability.
It can be used for:
- templates;
- tips;
- medium or long extensions;
- structured styles;
- clients requiring a sturdy construction.
The choice between flexibility and rigidity must be suited to the natural nail plate and the desired length.
Gel in a pot or builder gel in a bottle?
Gel in a pot
Gel in a pot is applied using a separate brush. It allows you to control the amount of product and tocreate a proper build-up.
It is particularly suitable for learning:
- how to position the material;
- the creation of theapex;
- extensions;
- modelling;
- working with templates.
Builder Gel in a bottle
The product in the bottle is applied using the built-in brush. It can be quicker and more convenient for building up the nails.
It is often suitable for:
- natural nails;
- short extensions;
- simple touch-ups;
- beginners in semi-permanent extensions.
To learn comprehensive building and extension techniques, gel in a pot generally offersmore possibilities.
Which Gel Should You Choose Depending on the Technique?
For building up natural nails
Choose a Builder Gel or a Flexible Builder Gel suited to the flexibility of the nail plate.
A medium viscosity makes it easier to create a slight apex without producing too much &eacut;thickness.
For application on tips
Use a builder gel capable of creating a solid structure over the tip.
A gel with medium or medium-thick gel can offer good control.
For extensions using a nail form
The gel must remain stable enough on the template and support the length created.
If you’re a beginner, start with short extensions before moving on to longer styles.
For a French manicure
A Nude Pink or Cover gel helps to create an even base. It can be combined with a white gel or a white semi-permanent polish.
For a Baby Boomer
Choose a nude or rosy base, paired with a milky white that’s easy to blend.
For touch-ups
A Clear or Cover gel can be used depending on the desired effect and the extent of therepair.
Which First Gel Kit Should You Buy?
You don’t need to buy twenty colours to get started.
A basic selection might include:
- A medium-viscosity Nude Pink builder gel
- A Clear gel for encapsulations and repairs
- A Milky or Cover gel for
- A Nail Prep
- A suitable primer
- A base coat if required by the procedure
- A glossy top coat
- Some popular semi-permanent nail polishes
This selection allows you to create a wide variety of designs withoutwasting time thinking about it.
LuluNails advises beginners to start with the essentials, thenexpand their kit according to their clients’ actual needs.
The Equipment You’ll Need to Get Started with Gel Nails
To apply a gel build-up, you will need:
- disinfectant;
- cuticle pusher;
- specialised nail files;
- polishing block;
- dust dust-removal brush;
- Nail Prep;
- Primer;
- Base Coat according to the protocol ;
- build gel;
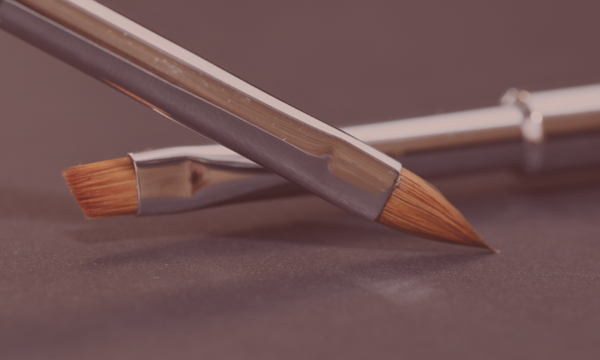
- gel brush;
- cleaner;
- tips or templates;
- glue for tips if required ;
- compatible UV/LED lamp;
- Top Coat;
- cuticle oil.
A nail file can come in handy with experience, but a beginner must first learn to use it correctly to avoid damaging the natural nail.
How to Apply a Builder Gel When You’re Just Starting Out?
1. Prepare the natural nail
Disinfect your hands and equipment. Push back the cuticles and gently remove any dead skin from the nail plate.
2. Mattify the surface
Remove the natural shine without thinning the nail excessively.
3. Dust off
Remove all dust from the surface, the sides and the free edge.
4. Apply the preparation products
Apply the Nail Prep, followed by a small amount of Primer in accordance with the protocol.
Évite contact with the skin.
5. Apply the base coat
If the gel being used requires a Base Coat, apply a thin layer and then cure.
6. Apply a bonding layer
Apply a thin layer of gel without curing it immediately if the build protocol specifies this.
7. Build the apex
Take a small amount of gel and place it in the stress zone. Guide the product towards the sides, the free edge and the cuticles without touching the skin.
8. Briefly turn the hand over
Where the viscosity allows, turning your hand over for a few seconds can help the gel to re-centre and form the apex.
9. Curing
Position your hand correctly under a compatible lamp and allow the specified curing time.
10. Check and file
Check the shape, parallelism, thickness and surface finish. File only if necessary.
11. Apply the finish
Finish with a semi-permanent varnish or apply a top coat straight away.
Common Mistakes Made by Beginners
Choosing a gel that’s too runny
A gel that is too runny can quickly seep into the cuticles. Start with a medium viscosity.
Using too much product
Using a large amount does not automatically make the application stronger. It can create a heavy structureand prevent proper curing.
Building a completely flat nail
A build without a properly shaped apex is at risk of cracking or breaking in the stress zone.
Applying gel to the skin
Any product that has come into contact with the skin must be removed before curing.
Neglecting preparation
Most lifting is caused by insufficient preparation, cuticles left on the nail plate or dust.
Reduce curing time
Always adhere to the recommended curing time for the product. A gel that has hardened on the surface may not be fully cured on the inside.
Starting with extensions that are too long
Start by working on short or medium lengths to master the structure.
How can you tell if the gel has cured properly?
A properly cured product must meet the specifications set out by the manufacturer.
However, it is important to understand that a gel may appear hard on the surface whilst remaining insufficiently polymerised on the
To minimise this risk:
- use a compatible lamp;
- adhere to the recommended time;
- avoid applying excessively thick layers;
- position your hand correctly;
- use your thumb separately if necessary;
- Check the condition of the lamp regularly.
Do not test the curing process by touching uncured productwith your skin.
Why Does the Gel Heat Up Under the Lamp?
The gel gives off heat during polymerisation. This sensation may be more pronounced when:
- the layer is thick;
- the natural nail is thin;
- there is a generous amount of product;
- the lamp operates immediately at full intensity;
- the plate has been limited too much.
Use the lamp’s low-temperature mode where available, and briefly remove your hand if the heat becomes painful.
How to Prevent Peeling?
To improve hold:
Prepare your cuticles carefully
Matte the entire nail plate without damaging it
Remove all dust
Use the Nail Prep and Primer correctly
Do not touch the nail again after preparation
Avoid the skin and cuticles
Create a suitable apex
Use a compatible lamp
Observe the curing times
Addjust the length to match the natural nail
The quality of the gel is important, but technique remains essential.
Why Choose LuluNails Belgium Gels?
LuluNails is a Belgian brand, a supplier and training centre specialising innail care in Liège.
Here you can find:
- builder gels;
- Builder Gels;
- Flexible Builder Gels;
- Clear, Milky, Nude and Cover gels;
- self-levelling gels;
- Rubber Bases;
- Acrygels and Polygels;
- semi-permanent polishes ;
- Base Coats and Top Coats ;
- UV/LED lamps;
- brushes, files and accessories;
- starter kits.
These products are aimed at beginners, nail techniciansand salons looking for professional equipment at affordable prices.
Gel Training for Beginners in Liège
Not sure which gel to choose, or are you having trouble with theapex, filing or lifting?
LuluNails offers training courses in Liège suitable for beginners.
Depending on the course you choose, you can learn:
- how to prepare the natural nail;
- how to treat cuticles;
- using Nail Prep and Primer;
- building up the nail;
- building the apex;
- application onto tips;
- extensions using a template;
- filling;
- filing;
- French manicure;
- the Baby Boomer;
- how to remove it correctly.
Each participant receives explanations tailored to their level. The necessary equipmentrequired is available on site, and a certificate of attendance is issued at the end of the course.
Frequently Asked Questions
Which gel should I choose for my very first application?
A medium-viscosity, self-levelling Nude Pink gel isa versatile choice for beginners.
Is a thick gel easier to use?
Not always. It runs less, but it can be harder to apply and may require more filing.
Can you do an extension using Flexible Builder Gel?
It depends on the formula, the length and the product’s instructions. Some are primarily designedfor short extensions.
Is Clear Gel essential?
It isn’t compulsory, but it’s very useful for repairs, encapsulation and colour-coated builds.
Do you need a base coat under the gel?
It depends on the system used. Always check the manufacturer’s instructions.
How many gels should you buy to get started?
Three well-chosen gels may be enough: one Rose Nude, one Clear and one Milky or Cover.
Can you learn on your own?
It is possible to practise gradually, but face-to-face training allows for quick correction ofpreparation, the apex, filing and the positioning of the restoration.
Conclusion
To find out which builder gel to choose when you’re just starting out, opt for a self--self-levelling gel of medium viscosity, stable enough to be controlled without requiring too much filing.
A Nude Pink or Natural Cover shade makes it easier to see the build-up and is suitable for many applications. Clear gel is useful for repairs and encapsulations, whilst Milky gel provides a natural finish that is in high demand.
With LuluNails Belgium, you can find professional gels, affordable equipment and training courses in Liège to learn how to create strong, even and elegant nails.