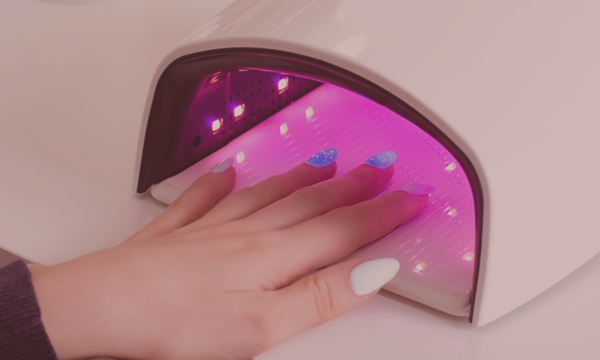
Is your gel manicure starting to peel off after a few days? Find out the main causes of peeling and the essential steps for achieving a strong, long-lasting gel manicure: preparation, cuticles, Nail Prep, Primer, Base Coat, apex and curing.
How to Prevent Construction Gel from Peeling Off?
Lifting of the builder gel is one of the mostencountered by beginners and nail technicians. It can occur near the cuticles, at the sides, along the free edge or beneath the extension.
A professional-quality gel alone is not enough to guarantee good hold. The preparation of the natural nail, the choice of products, the shaping of the apex, curing and the client’s habits also play a vital role.
At LuluNails Belgium, a Belgian brand specialising in nail products and training in Liège, we explain how to identify the causes of lifting and improve the durability of your gel manicures.
Why does the Builder Gel come off?
The most common causes are:
- inadequate preparation of the nail;
- cuticles still present on the nail plate;
- dust or moisture under the product;
- a gel applied to the skin;
- an unsuitable combination of products;
- insufficient catalysis;
- inappropriate architecture;
- an inadequately protected free edge;
- filling carried out too late;
- incorrect daily use of the nails.
To resolve the problem permanently, it is necessary to determine where the separation occurs and when it begins.
The Different Types of Detachment
Detachment near the cuticles
When an air pocket appears at the base of the nail, possible causes include:
- incorrectly removed cuticles;
- gel coming into contact with the skin;
- incomplete preparation;
- too much primer;
- the product is too thick near the cuticles;
- dust left on the plate.
Peeling at the sides
Peeling along the parallel lines may be caused by:
- a product applied to the side folds;
- a poorly prepared plate on the sides;
- incorrect filing;
- an overly thin structure;
- a gel unsuitable for the flexibility of the natural nail.
Lifting at the free edge
When the gel lifts at the tip, check:
- whether the free edge has been correctly prepared;
- whether the material fully covers and protects the tip;
- if the natural nail is separating from the gel underneath;
- if the length is suitedto the natural nail plate;
- if the client uses her nails as tools.
Complete detachment of the nail extension
When a nail extension comes away almost entirely, this may indicate:
- a greasy or damp plate;
- incorrect preparation procedure;
- incompatible products;
- an unsuitable lamp;
- incorrect curing;
- a base coat unsuitable for the type of nail.
1. Carry out an assessment before application
Before you begin, examine the natural nails.
In particular, check:
- their flexibility;
- their thickness;
- their length;
- their general condition;
- the presence of cracks;
- previous areas of detachment;
- the client’s professional or daily habits.
A very flexible nail does not behave like a rigid plate. A construction that is too rigid on a very flexible nail can create tension and lead to lifting.
In the event of pain, redness, unusual discolouration, inflammation or suspected infection, the nail must not be covered. Refer the client to a healthcare professional.
2. Disinfect Hands, Tools and the Work Surface
Hygiene is essential before every treatment.
Before the application:
- disinfect the client’s hands;
- clean and disinfect reusable equipment;
- prepare a clean work surface;
- use suitable consumables;
- do notuse a personal nail file on multiple clients without following the appropriate protocol.
Hygiene protects the client and ensures you are working on a clean surface.
3. Preparing Cuticles Correctly
Preparing the cuticles is one of the most important steps in preventing lifting.
You need to:
- gently push back the cuticles;
- clear away any folds;
- remove any small pieces of skin adhering to the nail plate;
- check theof the nail;
- remove any residue without hurting the client.
A thin, invisible layer of cuticle can preventprevent the gel from adhering properly.
Caution: do not cut into the living tissue excessively or cause any injury.
4. Mattifying the Natural Nail Without Thinning It
The aim isis not to file the natural nail heavily, but to remove its shine on a regular basis.
Use a suitable file or block and work gently around the cuticles and along the sides.
After preparation, the nail plate should be:
✔ Uniformly matt
✔ Free from shiny patches
✔ Dust-free
✔ Free from moisture
✔ Free from skin residue
Over-filing weakens the nail and can also increase discomfort during curing.
5. Remove All Dust
Dust createsforms a barrier between the natural nail and the bonding products.
Use a clean brush to remove dust:
- the surface;
- the sides;
- the free edge;
- the cuticle area;
- the underside of the nail, if necessary.
Do not touch the nail plate with your fingers after this step. Contact may transfer natural oils onto the surface.
6. Using Nail Prep Correctly
Nail Prep helps to temporarily dehydrate the nail plate and remove surface moisture.
Apply an appropriate amount, then allow it to evaporate in accordance with the protocol.
A naturally greasy or damp surface may require particularly thorough preparation. This does not mean applying multiple layers of product indiscriminately.
7. Choose a primer suited to your needs
The primer improves adhesion between the natural nail and the gel system.
Depending on the product, it may be:
- acid-free;
- acid-based;
- adhesive with residue;
- specifically designed for a particular system.
Apply a very thin layer. Applying too much may have the opposite effect and cause the film to peel off.
Avoid contact with the skin and always follow the manufacturer’s instructions.
8. Apply the Base Coat
Some builder gels do notrequire a Base Coat or a bonding layer, whilst others follow a different protocol.
When a base coat is required:
- apply a very thin layer;
- work the product into the prepared surface;
- do not touch the cuticles;
- observe the curing time;
- do not remove the sticky layer unless otherwise instructed.
A base coat that is too thick may run towards the cuticles or create an unstable base.
9. Never apply the gel to the skin
The product must not come into contact with:
- cuticles;
- the lateral folds;
- the skin beneath the free edge.
If gel runs onto the skin, remove it before curing. Never deliberately cure product that has overflowed.
Repeated skin contact with uncured gel may increase the risk of sensitisation and allergy.
To work cleanly:
- use a fine brush near the cuticles;
- controlthe amount of gel;
- work on one or two nails at a time if the product is runny;
- carry out a short pre-when the protocol allows it.
10. Choose a Viscosity Suitableto Your Level
A very runny gel can quickly run down the sides, especially in warm weather.
To start with, a medium or thixotropic viscosityor thixotropic gel is often easier to control.
A self-levelling gel can reduce brush marks and the need for filing, but it must be monitored before curing.
The room temperature also affects the texture:
- heat generally makes the gel more fluid;
- Cold temperatures can make it thicker.
11. Building a Proper Apex
The apex is the reinforced area that helps the installation withstand impacts.
If the apex is too flat, this can lead to:
- cracks;
- breakage;
- stresses;
- delamination on the sides.
Conversely, an excessively thick construction can be uncomfortable and unbalanced.
The position and height of the apex depend on:
- the length;
- the shape;
- nail type;
- of the technique;
- of the stress zone.
Proper design distributes stresses and improves the durability of the application.
12. Adapt the Length to Natural Nails
A very long extension on a short natural nail creates significant leverage.
For a beginner or a client with brittle nails, opt for a reasonable length to begin with.
The length must take into account:
- the natural nail bed;
- lifestyle;
- occupational activity;
- the customer’s experience;
- the structure created.
13. Positioning the Tips and Capsules Correctly
An ill-fitting cap can create tension and lead to detachment.
It must:
- cover the full width of thenail;
- not squeeze the sides;
- êbe correctly positioned;
- must not contain any air pockets;
- be secured using a suitable product.
A capsule that is too small may exert pressure on the sides and cause breakage or lifting.
14. Positioning the Templates Correctly
An incorrectly positioned template may result in an unbalanced extension, either facing upwards or downwards.
Check:
- the nail shaft;
- the closure beneath the free edge;
- no gap between the nail and the template;
- symmetry;
- the desired shape.
A correct structure from the outset minimises the need for corrections and improves strength.
15. Avoiding Air Bubbles
Bubbles can weaken the structure and create areas of weakness.
To avoid them:
- do not whip the gel with the brush;
- gently scoop out the product;
- do not stir the pot excessively;
- place the gel gently rather than squeezing it;
- remove any visible bubbles before curing.
Close &the jar after use and move it away from the light of the lamp.
16. Cure with a Compatible Lamp
Incorrect curing may compromise the hold and leave the product insufficiently polymerised.
Check:
- UV/LED compatibility;
- wavelengths;
- recommended exposure time;
- the condition of the lamp;
- the arrangement of the LEDs;
- the positioning of the hand.
A lamp with a high wattage is not automatically compatible with all formulations.
Follow the gel application protocol and do not arbitrarily reduce the curing time.
17. Apply the Correct Thicknesses
A layer that is too thick may not cure properly in the centre. A layer that is too thin in the stress zone may weaken the structure.
The gel must be distributed according to the design:
- thinner near the cuticles;
- reinforced in the stress zone;
- properly tapered towards the free edge;
- balanced at the sides.
18. Check the Position of the Hand under the Lamp
The hand should remain flat, in the centre of the lamp, with the fingers slightly spread apart.
The thumb may require separate catalysation, as it is often tilted when the whole hand is placed on the lamp at the same time.
Incorrect positioning can lead to uneven exposure on certain sides of the nail.
19. Protecting the Free Edge Correctly
The free edge must be built up and finished evenly.
Avoid:
- areas that are too thin;
- irregularities;
- edges that snag;
- the natural nail visible beneath the gel;
- the gel is too thick under the extension.
After filing, check that the structure has not been filed down too much.
20. Avoid Mixing Products at Random
A base coat, primer, gel and lamp from different systems may sometimes work together, but this compatibility should not be assumed.
To minimise risks:
- follow the recommended protocol;
- check the technical data sheets;
- test the combinations professionally;
- do not add multiple primers unnecessarily;
- do not mix different gels directly in one pot.
How to Apply a Long-Lasting Gel Manicure?
Equipment required
- Sanitiser
- Cuticle pusher
- Nail files
- Polishing block
- Dust brush
- Nail Prep
- Suitable primer
- Base Coat according to protocol
- LuluNails Builder Gel
- Gel brush
- Tips, capsules or stencils depending on the technique
- Compatible UV/LED lamp
- Top Coat
- Cuticle oil
Summary of the procedure
- Disinfect your hands and equipment.
- Carefully prepare the cuticles.
- Evenly mattify the nail plate.
- Remove all dust.
- Apply the Nail Prep.
- Apply a thin layer of Primer.
- Apply the base coat if necessary.
- Build up the nail without touching the skin.
- Create a suitable apex.
- Cure according to the instructions.
- Correct the shape by filing.
- Apply the colour and top coat.
- Moisturise the cuticles once the application is complete.
Why Do Peeling Issues Appear After a Week?
When the application lasts for several days before lifting, there are several possible causes:
- a small area of frost had affected the skin;
- a pocket ofair was already present;
- the apex was insufficient;
- the customer suffered a shock;
- the length was too great;
- the previous fill had not been properly cleaned;
- the structure was not suited to the flexibility of the nail.
The location of the lift often provides a clue as to its cause.
Can a lifted area be reattached?
No. You should not simply apply gel over a lifted area.
The gap may trap moisture and impurities. You must remove the lifted section completely before rebuilding.
If any green, yellow, brown or unusual discolouration appears, do not cover the area without a proper diagnosis.
How to Care for a Gel Manicure?
To prolong the life of the nails, advise the client to:
Wear gloves when doing housework
Évite using her nails as tools
Do not pick at lifted areas
Apply cuticle oil regularly
Book an appointment for a
Report any lifting straight away
Avoid cutting the nails too short with nail clippers
A top-up is usually required after a few weeks, depending on how quickly your nails grow and the structure of the application.
Why Choose LuluNails Belgium Products?
LuluNails is a Belgian brand specialising in nail care products and training in Liège.
The range includes, in particular:
- builder gels;
- self-levelling Builder Gels depending on the product code;
- Flexible Builder Gels;
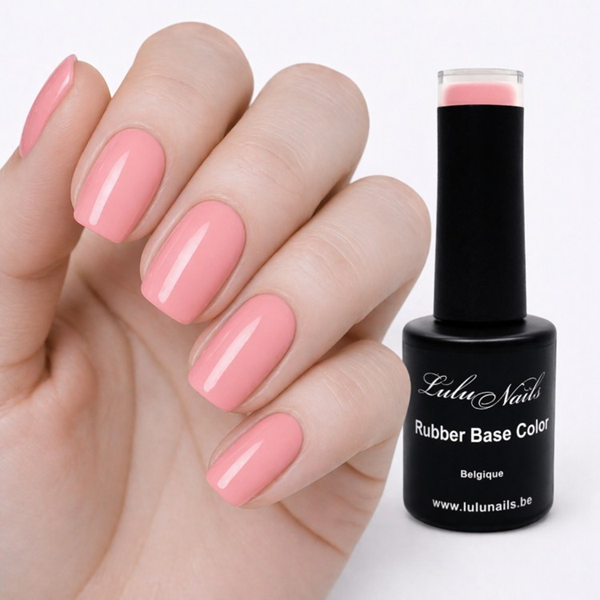
- Rubber Bases ;
- Acrygels and Polygels;
- Nail Prep and Primers ;
- Base Coats and Top Coats;
- semi-permanent nail polishes;
- UV/LED lamps;
- professional brushes, files and accessories.
LuluNails products are designed for beginners, nail technicians, salons and training centres looking for professional products at affordable prices.
Gel Nail Technician Training in Liège
Do you regularly experience lifting, or would you like to learn a professional technique?
LuluNails offers training courses in Liège covering, in particular:
- preparing the natural nail;
- cuticle care;
- applying Nail Prep and Primer;
- wrapping;
- building the apex;
- application onto tips;
- extensions using a template;
- filling;
- professional filing;
- French manicure;
- the Baby Boomer;
- the correct removal technique.
All equipment is provided on site and a certificate of attendance is issued at the end of the course.
Conclusion
To prevent the builder gel from lifting, each step must becarried out with precision. Thorough preparation, properly cleared cuticles, a correctly applied primer, a balanced build and appropriate curing are essential.
The product must never come into contact with the skin, and any lifted areas must be removed before a top-up.
With LuluNails Belgium, you can discover professional builder gels, preparation products, UV/LED lamps and training courses in Liège to improve the durability and finish of your nail applications.